Introduction
The phrase “Italian bread recipe” evokes images of rustic loaves, golden crusts, and the irresistible aroma of freshly baked bread wafting through the kitchen. Italian bread is not just food; it’s a cornerstone of Italy’s rich culinary history, connecting generations through tradition and flavor.
Whether it’s the pillowy softness of Focaccia, the airy texture of Ciabatta, or the simple elegance of Pane Toscano, each type of Italian bread has a story to tell. Making Italian bread at home is a rewarding journey, combining ancient techniques with a modern touch.
In this guide, we’ll explore everything you need to know about the perfect Italian bread recipe, from selecting ingredients to mastering baking techniques. With detailed steps and helpful tips, you’ll soon be enjoying a slice of Italy from the comfort of your home.
1. Exploring Types of Italian Bread
Italian bread is as diverse as the regions it comes from, each with unique textures, flavors, and uses. Below are some iconic varieties that showcase the artistry and tradition of Italian breadmaking.
1.1. Ciabatta
Ciabatta, meaning “slipper” in Italian, is a rustic bread known for its elongated shape and open crumb structure. It boasts a crispy crust and a chewy, airy interior, thanks to a high hydration dough. This bread is perfect for sandwiches, soaking up olive oil, or pairing with hearty soups.
1.2. Focaccia
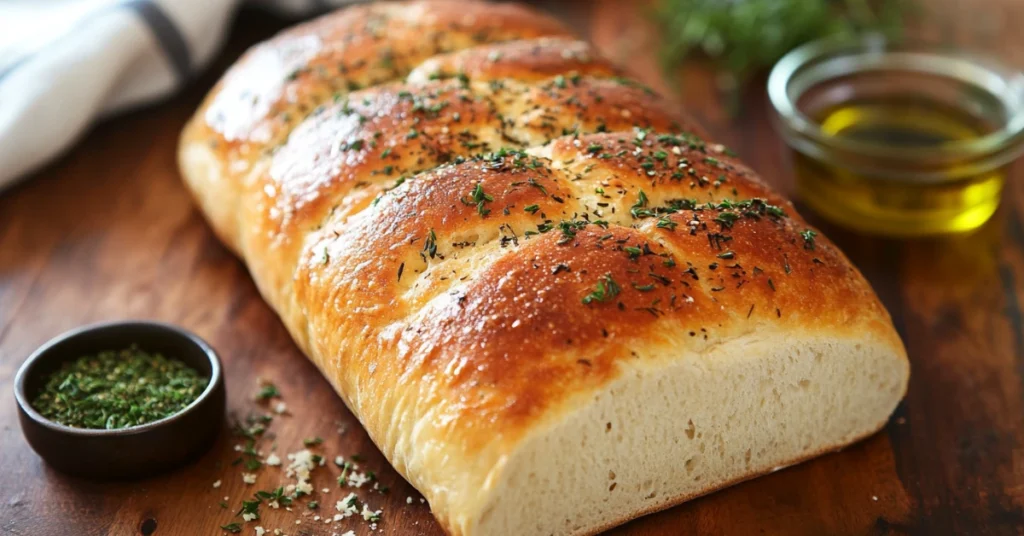
A staple of Ligurian cuisine, Focaccia is a flat, oven-baked bread often infused with olive oil, herbs, and sometimes topped with ingredients like tomatoes or olives. Its rich, savory flavor makes it an excellent standalone snack or a companion to a light salad.
1.3. Pane Toscano
Pane Toscano is a saltless bread with a soft, dense crumb. Originating from Tuscany, its unique flavor complements the region’s rich and salty dishes like prosciutto and Pecorino cheese. This bread symbolizes simplicity and tradition in Italian baking.
1.4. Grissini
Grissini, or Italian breadsticks, are thin, crispy, and often seasoned with herbs or seeds. Originally from Piedmont, these breadsticks are an ideal appetizer or accompaniment to dips and spreads. Their crunchy texture adds variety to any meal.
2. Ingredients for an Authentic Italian Bread Recipe
The foundation of a successful Italian bread recipe lies in its ingredients. Using high-quality, authentic components ensures the bread’s flavor and texture are true to tradition.
2.1. Flour Choices
The type of flour you use significantly affects the bread’s texture and flavor. Italian bread often uses all-purpose flour, bread flour, or a mix of both. For specialty breads like Pane Toscano, stone-ground flour adds an extra layer of authenticity.
2.2. Yeast and Leavening Agents
Yeast is essential for making Italian bread rise. Active dry yeast or fresh yeast are commonly used. Some recipes, like Ciabatta, benefit from a starter or biga, a pre-fermentation mixture that adds depth to the flavor.
2.3. Olive Oil and Seasonings
Extra-virgin olive oil is a cornerstone of Italian bread recipes, lending richness and a hint of fruitiness to the dough. Seasonings like sea salt, rosemary, and garlic enhance the flavor, especially in varieties like Focaccia.
3. Step-by-Step Italian Bread Recipe

Creating the perfect Italian bread recipe requires patience and attention to detail. Follow these steps to make a traditional loaf that’s sure to impress.
3.1. Mixing the Dough
Start by combining the essential ingredients:
- Flour: 500 grams of bread flour or all-purpose flour
- Water: 300-350 ml of lukewarm water
- Yeast: 2 teaspoons of active dry yeast or 15 grams of fresh yeast
- Olive Oil: 2 tablespoons of extra-virgin olive oil
- Salt: 1 teaspoon
- In a small bowl, dissolve the yeast in lukewarm water with a pinch of sugar and let it activate for 5-10 minutes.
- In a large mixing bowl, combine the flour and salt. Slowly add the yeast mixture and olive oil, mixing with a wooden spoon or your hands until the dough comes together.
3.2. Kneading Techniques
Kneading is critical for developing gluten, which gives the bread its structure and chewiness.
- Transfer the dough to a floured surface and knead for about 10-12 minutes. Use the “push, fold, and rotate” technique to ensure the dough is smooth and elastic.
- If the dough is too sticky, add a bit of flour, but avoid overdoing it, as this can make the bread dense.
3.3. Proofing the Dough
Proofing allows the dough to rise, enhancing its flavor and texture.
- Place the kneaded dough in a lightly oiled bowl and cover it with a damp cloth. Let it rise in a warm, draft-free area for 1-2 hours or until it doubles in size.
- Once proofed, punch the dough down gently to release any air bubbles. Shape it according to the type of bread you’re making (e.g., a loaf for Ciabatta or a flat shape for Focaccia).
3.4. Baking to Perfection
- Preheat your oven to 220°C (430°F) and place a baking stone or tray inside to heat up.
- Transfer the shaped dough to the hot surface. For a crisp crust, spray the oven walls with water or place a small tray of water inside to create steam.
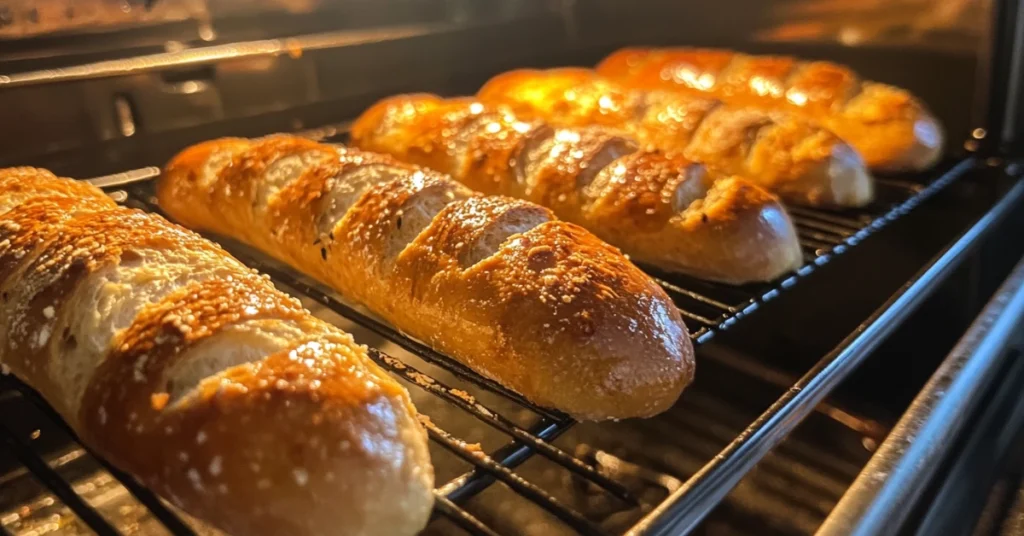
- Bake for 20-30 minutes or until the crust is golden brown and the bread sounds hollow when tapped on the bottom.
- Allow the bread to cool on a wire rack for at least 15 minutes before slicing.
4. Tips for the Perfect Italian Bread Recipe

Mastering the art of Italian bread requires more than following a recipe. These tips will help you achieve professional-quality results every time.
4.1. Ideal Baking Temperatures
The oven temperature is crucial for achieving the perfect crust and crumb. For most Italian bread recipes:
- Preheat the oven to 220–230°C (430–450°F).
- Use a pizza stone or an upside-down baking tray to mimic a stone oven’s heat distribution.
For a golden crust, bake with steam by adding a small pan of hot water to the oven or misting the dough with water before baking.
4.2. Achieving the Right Texture
- Hydration: Italian bread like Ciabatta relies on high hydration dough (more water relative to flour). This creates the characteristic open crumb and chewy texture.
- Kneading: Knead the dough until it’s smooth and elastic. This step is crucial for gluten development.
- Proofing: Allow the dough ample time to rise. A long, slow rise enhances flavor and texture, so don’t rush the process.
4.3. Common Adjustments
Italian bread recipes can be adjusted to suit different preferences:
- Flavor Variations: Add ingredients like garlic, rosemary, or sun-dried tomatoes for extra flavor.
- Texture Adjustments: For a softer crust, brush the loaf with olive oil before baking. For a crispier crust, bake longer at a slightly lower temperature.
5. Common Mistakes to Avoid When Making Italian Bread Recipe
Even experienced bakers can encounter challenges. Avoid these common pitfalls for a flawless loaf:
5.1. Overproofing or Underproofing
- Overproofing: If the dough rises too much, it can collapse during baking, resulting in dense bread. Check the dough periodically, and bake when it has doubled in size.
- Underproofing: Baking dough that hasn’t risen enough leads to poor structure and minimal air pockets. Ensure the dough feels light and airy before proceeding.
5.2. Using Incorrect Measurements
- Always weigh your ingredients using a kitchen scale for accuracy. Too much flour can make the bread heavy, while too little can cause it to spread out rather than rise.
5.3. Ignoring Rest Times
- Rest periods, such as the time between kneading and baking, are critical for flavor development and texture. Rushing this process often results in bland or uneven bread.
6. Serving and Storing Italian Bread

Once your Italian bread recipe is complete, knowing how to serve and store it properly will help you enjoy it to the fullest.
6.1. Pairing Italian Bread with Meals
Italian bread is incredibly versatile and pairs beautifully with a variety of dishes:
- Appetizers: Serve with olive oil and balsamic vinegar for dipping or alongside an antipasto platter.
- Soups and Stews: Rustic breads like Ciabatta or Pane Toscano are perfect for soaking up rich broths and sauces.
- Main Dishes: Use as a side for pasta, lasagna, or meat dishes.
- Sandwiches: Fill Ciabatta with cured meats, cheese, and vegetables for a classic Italian sandwich.
6.2. Storing for Freshness
Italian bread is best enjoyed fresh, but proper storage can extend its life:
- Room Temperature: Store bread in a paper bag or a bread box to maintain its crust. Avoid plastic bags, which trap moisture and make the crust soggy.
- Freezing: For longer storage, wrap the bread tightly in aluminum foil or plastic wrap and freeze it. When ready to eat, thaw it at room temperature and refresh it in the oven for 5-10 minutes.
6.3. Reheating Techniques
- Oven: Preheat the oven to 180°C (350°F) and warm the bread for 10 minutes to restore its texture.
- Toaster Oven: Perfect for smaller slices, retaining the crunch without overcooking.
FAQs About Italian Bread Recipe
Q1: Why does my Italian bread not rise properly?
Improper rising can result from expired yeast, insufficient proofing time, or too cool an environment. Always check your yeast’s freshness and proof the dough in a warm area.
Q2: Can I use whole wheat flour instead of white flour?
Yes, but whole wheat flour absorbs more liquid, so you may need to adjust the hydration. Whole wheat also produces denser bread, so a mix with white flour is often recommended.
Q3: How can I achieve a crispier crust?
Baking with steam (e.g., adding water to the oven) and preheating a pizza stone are key to achieving a crisp crust. Avoid brushing the bread with oil before baking if you prefer a harder crust.
Q4: Is Italian bread always made without sugar?
Traditional recipes often avoid sugar, relying on the natural sweetness of flour. However, some variations may include a small amount for added flavor or to activate yeast more quickly.
Q5: Can I make Italian bread gluten-free?
Yes, gluten-free Italian bread recipes use alternative flours like almond, rice, or sorghum. These require binders like xanthan gum to mimic gluten’s elasticity.
Q6: What’s the difference between Italian and French bread?
Italian bread is often softer, enriched with olive oil, and comes in diverse shapes like Focaccia or Grissini. French bread typically has a harder crust and a more uniform structure, like the baguette.
Conclusion
Making your own Italian bread recipe is more than just baking; it’s a journey into the heart of Italy’s rich culinary heritage. With every loaf, you connect with centuries of tradition, where simple, wholesome ingredients transform into something truly magical. Italian bread symbolizes community, family, and the joy of sharing—values that are woven into every knead and every rise. For more on the history and cultural significance of Italian bread, you can explore this Wikipedia article on Italian bread.
The process of crafting Italian bread, from mixing the dough to pulling a golden loaf from the oven, is deeply satisfying. It teaches patience, precision, and the importance of care in the kitchen. Kneading the dough becomes a meditative experience, while the aroma of freshly baked bread fills your home with warmth and anticipation.
By embracing the techniques outlined in this guide, you’ll master the art of making Italian bread that rivals even the most renowned bakeries. You’ll learn to balance hydration for an airy crumb, achieve the perfect crust, and infuse your loaves with the authentic flavors of Italy. And while the bread itself is rewarding, the experience of making it is just as fulfilling—a blend of creativity, tradition, and culinary skill.
Italian bread is meant to be shared. Whether served alongside a family meal, offered as a gift, or enjoyed with friends, it brings people together in ways that few foods can. Every loaf you bake carries with it the love and care you’ve put into the process, creating memories that last far beyond the final slice.
So, roll up your sleeves, dust off your countertop, and embark on this delicious adventure. Enjoy the process, savor the results, and take pride in your creation. Share your homemade Italian bread with loved ones, knowing that you’re not just baking—you’re crafting moments that will be cherished for years to come.

